Installing Revere on Your BigCommerce Store
First step to installing Revere on your BigCommerce website is to sign up for Revere. If you have not already done so, go to https://app.irevere.com/mgr/create. Revere includes a number of Widgets to enhance customer experience and broaden your insight into how your customers feel about your product offerings.
Once you’ve created an account you’re ready to move on to the next step, preparing BigCommerce for Revere.
Prepare BigCommerce for Revere
Before you install Revere you must prepare your BigCommerce store. First, you want to create and add a BigCommerce Legacy API user and key to Revere for interoperability. Second, you will want to make a copy of your Theme so you can make changes to the Theme files. If you have already made previous edits to your theme it is likely you have already completed this step.
Add BigCommerce API Keys to Revere
In this step you will hook up your BigCommerce store to Revere to ensure the best display of up-to-date product data. You will be adding your API Keys from BigCommerce to Revere.
First, go to the BigCommerce Administration site, click “Advanced Settings -> Legacy API Settings”
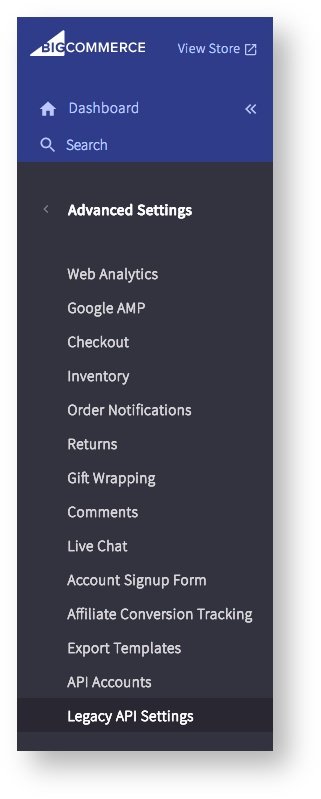
You’ll get a screen similar to below:
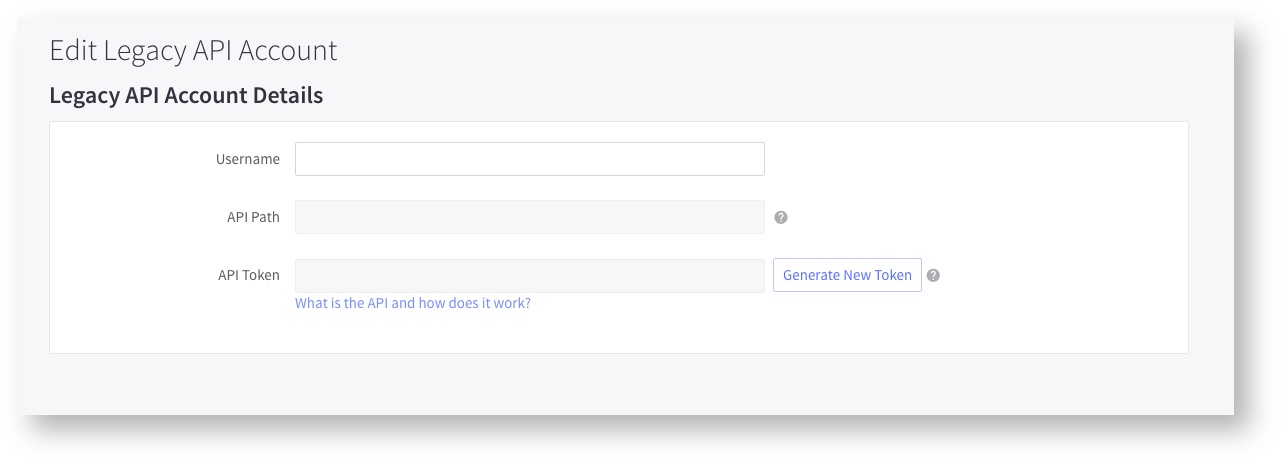
If this is your first time setting up an API Key, the fields will be blank. You will want to create a user if you have not already done so. Fill in a Username and select “Generate API Token”. The API Path and API Token fields will be populated with values. Copy all three values and save them for the next step.
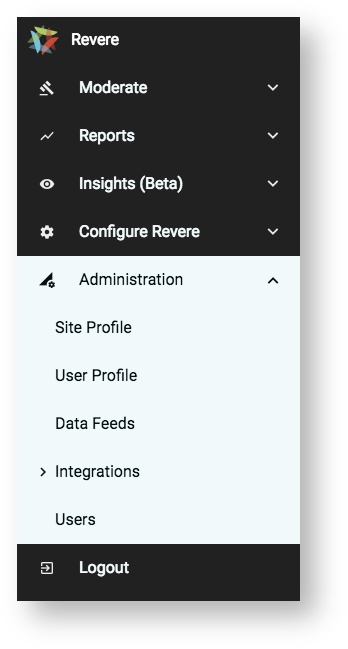
Next, open up the Revere Admin Tool. Select “Administration -> Integrations”
On the eCommerce Platform form you will see three fields: Username, API Path, and API Token. Using the details from BigCommerce fill out the form and select “Save API Details”.
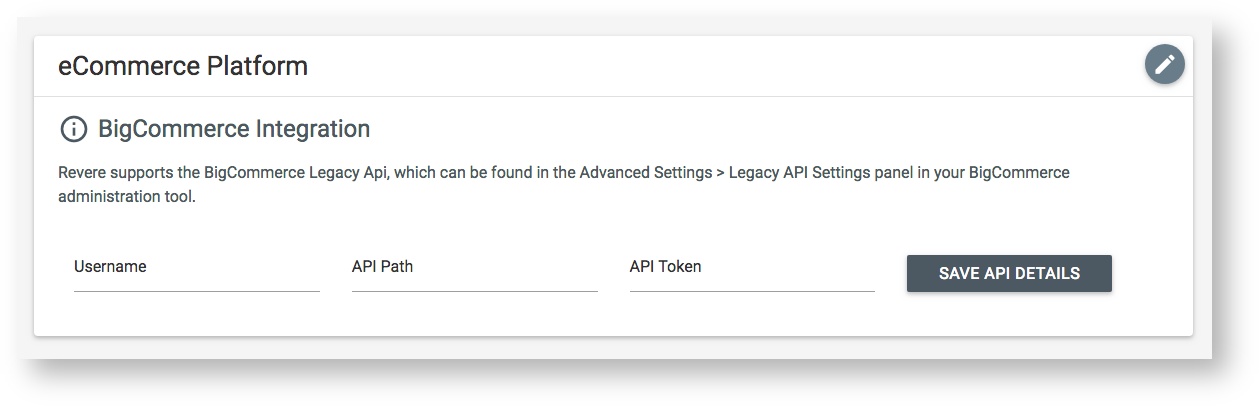
The Revere backend Engine is now integrated with BigCommerce. Nice and easy.
Create an Editable Copy of Your BigCommerce Theme
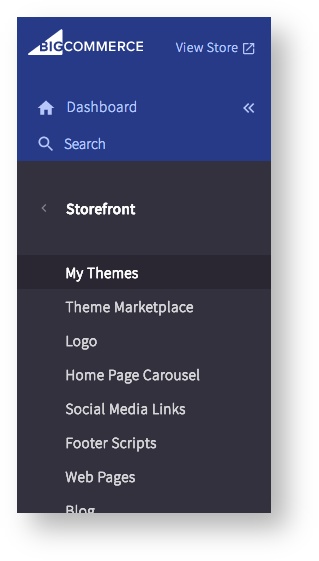
In the BigCommerce management tools, click the Storefront menu item, and select My Themes
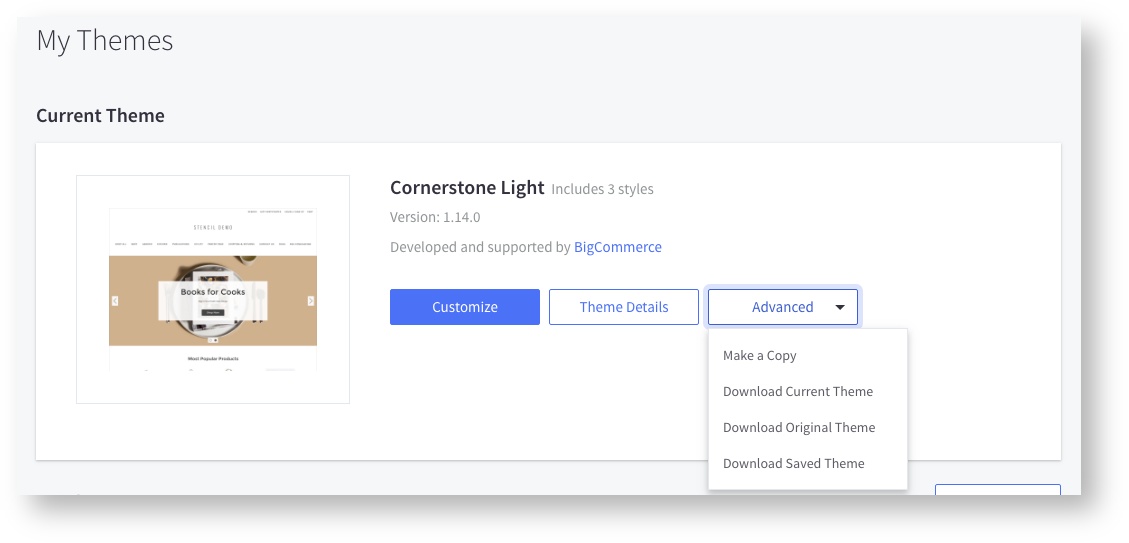
On the My Themes page, under Current Theme (or the theme to which you wish to add Revere) select “Advanced” then “Make a Copy”. For demonstration purposes we’re using the default theme, Cornerstone Light.
A dialog will pop up asking you to name the copy of your Theme.
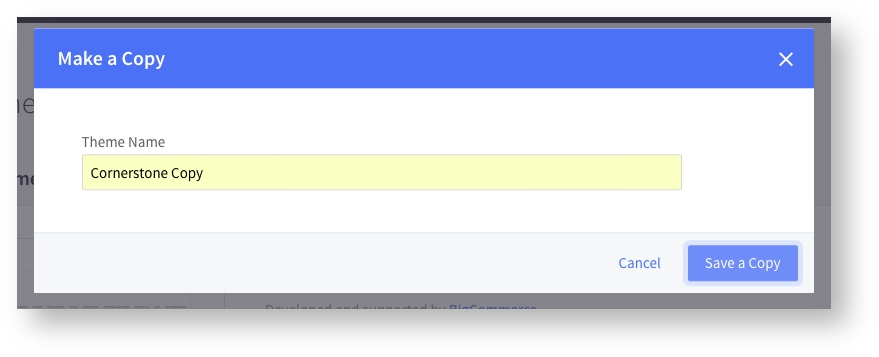
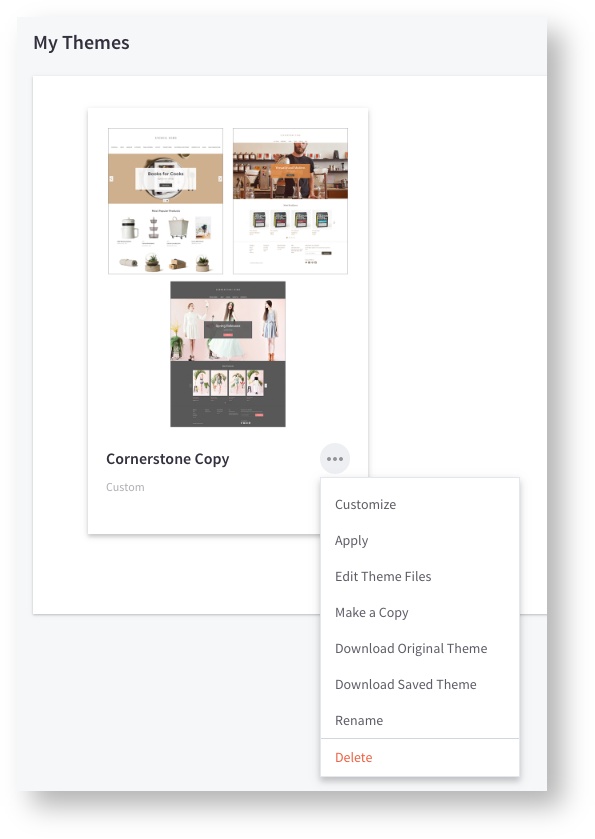
Select “Save a Copy”. After a moment the copy of your Theme will appear under My Themes. Click the “. . .” button and select Edit Theme Files.
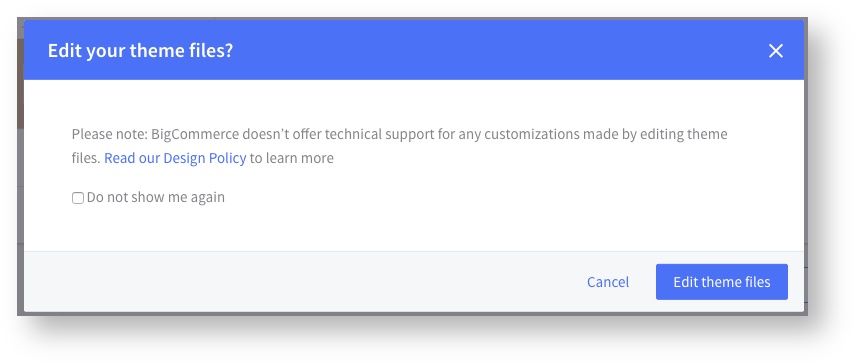
If this is your first time editing your custom theme you will get an alert box asking you if you are sure you want to edit your theme files. Select “Edit theme files”.
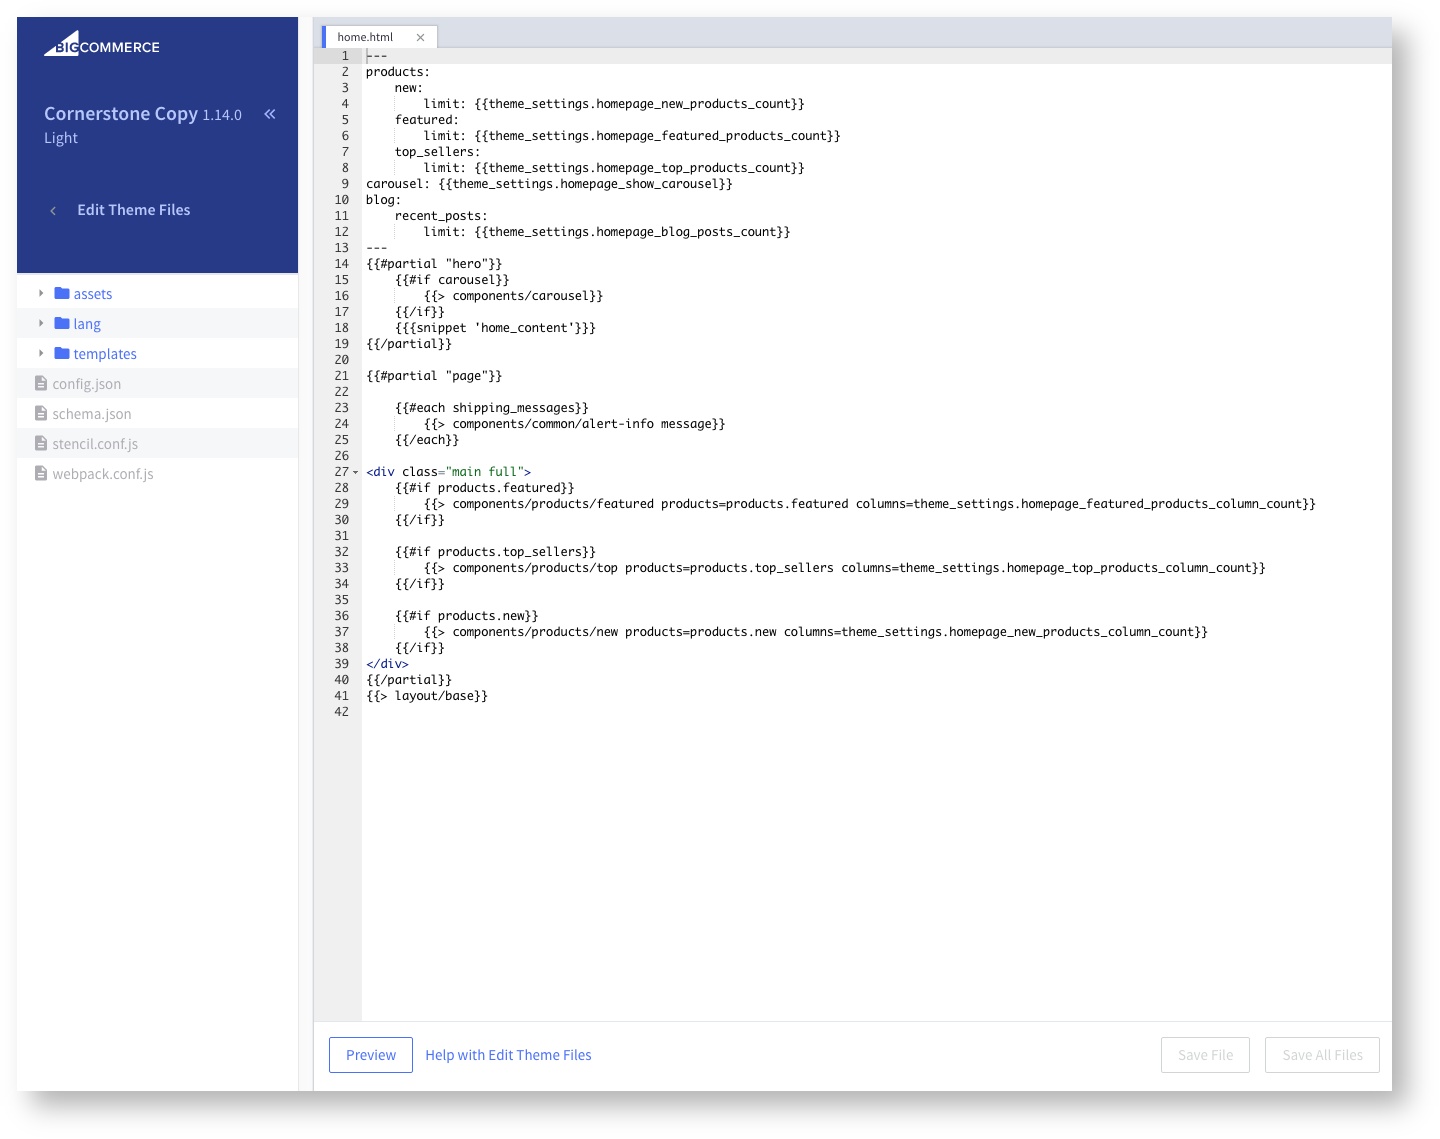
A new window/tab will open with the home.html file open and ready for editing
Great! You are now ready to install Revere on your website!
Revere Step-by-Step Installation Guide
There are 7 steps to installing Revere on your BigCommerce website.
- Place Revere CSS in the head of your site pages
- Insert the Revere JS and REV JS Object towards the bottom of your site pages
- Place the Revere Snippets Widget on Product Detail and Product Listing pages
- Insert the Reviews Widgets (Read/Write) Widgets on the Product Detail page
- Insert the Questions & Answers Widget on the Product Detail Page
- Add the Heartbeat Widget to Product Detail and Product Listing pages
- Add E-Commerce insights markup to cart.html and the Affiliate Tracking tool.
If you are joining us after skipping the section “Create an Editable Copy of Your BigCommerce Theme”, we left off with the BigCommerce Stencil Theme Editor open.
1. Expand the “templates” folder, then expand the “layouts” folder, and select “base.html”.

Between the <head> … </head> tags in the base.html page copy and paste the following:
<link href="https://cdn.irevere.com/engine/v2.0.0/revere.min.css" rel="stylesheet" type="text/css" media="all" />
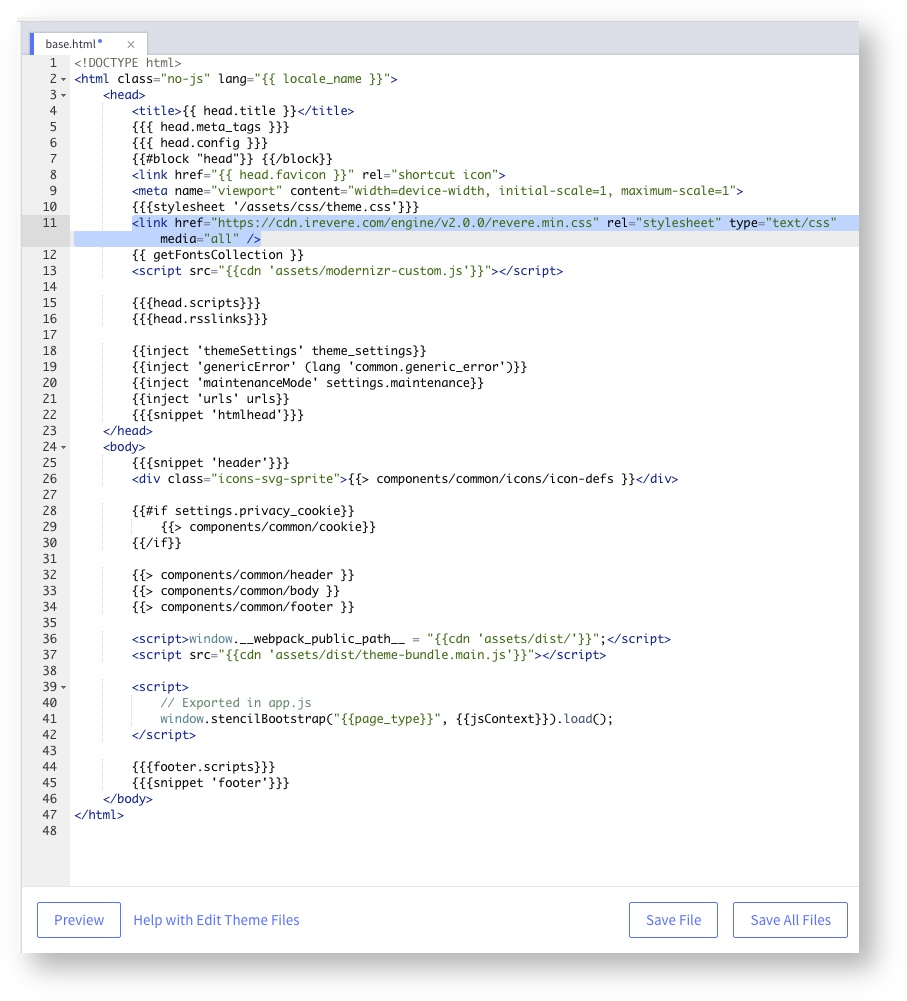
Click the “Save File” button to save your work.
2. Next you’re going to go back in to the BigCommerce Admin, from the left menu select Storefront then Footer Scripts.
Copy and paste the following code into the Footer field:

<script type="text/javascript">
    var REV = {
        CompanyId: 'CCCCC',
        UserId: '{{customer.email}}' // optional, but recommended for the best customer experience.
    }
</script>
<script src="https://cdn.irevere.com/engine/v2.0.0/revere.min.js" type="text/javascript"></script>
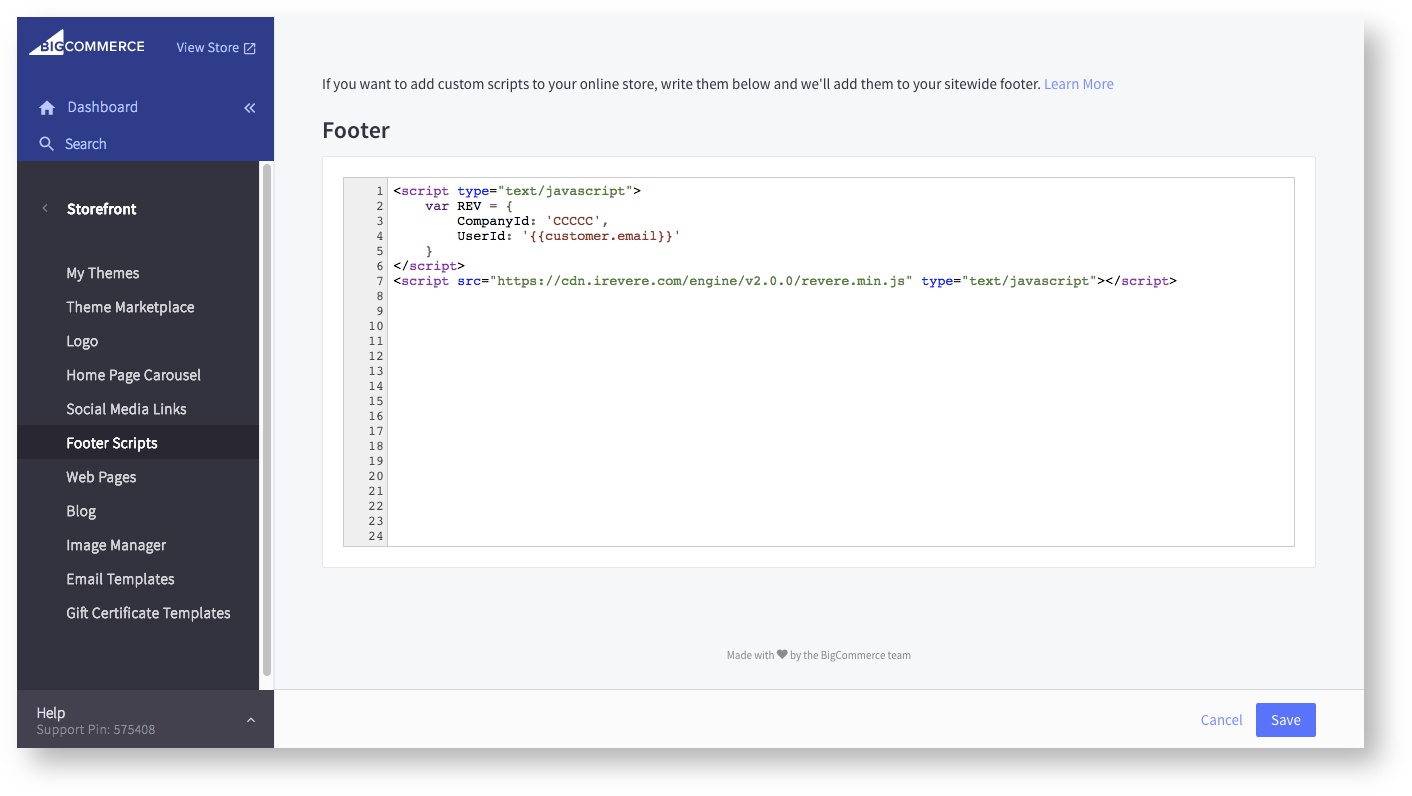
Change the ‘CompanyId’ value of ‘CCCCC’ to the CompanyId provided to you by Revere. You can find your Revere Company ID in the Revere Admin Tool. Click Administration then click Site Profile. Your Company ID is located on the bottom of the page under Site Access Keys.
Click the “Save” button to save your work.
3. Open up the product-view.html found at “templates/components/products/product-view.html” in the Stencil Theme Editor. Reminder: the theme we are using for this example is Cornerstone Light.
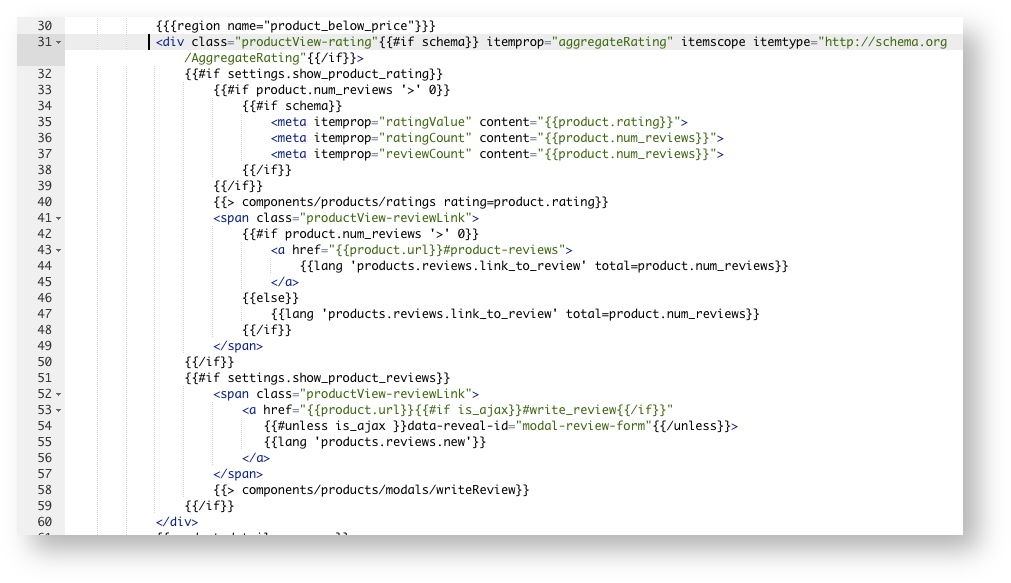
(*BigCommerce Themes will vary, it is important to select proper Widget placement for your particular theme)
On roughly line 31 of product-view.html, highlighted in the above image, we are going to comment out the existing review component by typing “{{!—” at the beginning of line 31 and “—}}” at the end of line 60 (without the quotes). Then we copy and paste the following Revere Snippet widget onto line 61.
<div data-revere="snippet" data-itemid="{{product.sku}}" class="Revere__wrap Revere__default snippet"></div>
Note the Handlebars opening and closing comment markup on lines 31 and 60. The Revere Snippet Widget has been added on Line 61.

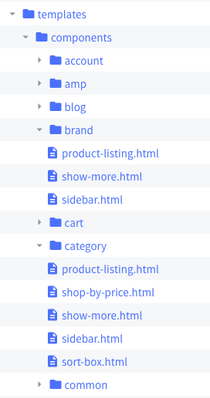
Next we are going to place the Snippet Widget on the product listing pages. The Cornerstone Light Theme uses both a Grid component and a List component to render an individual product on a listing page of products. Look for card.html and list-item.html inside of the “templates/components/products” theme directory. Both card.html and list-item.html will have a section that checks if you have selected “Show Ratings” in your theme. You must follow these steps for both card.html AND list-item.html
{{#if show_rating}}
.....
{{/if}}
Delete the contents of that if-block. Then copy and paste the following code for our original Snippet Widget:
<div data-revere="snippet" data-itemid="{{sku}}" class="Revere__wrap Revere__default snippet"></div>
Note the change from the previous step. Rather than {{product.sku}} we will be using {{sku}}.
card.html:

list-item.html:

Save your work. You’ve now placed your Revere Snippet Widgets on your site!
4. Next, you are going to place the Review Read and Review Write Widgets on the product detail page. In the Theme editor open product.html, found at “template/pages/product.html”.

Comment out the existing code on line 27 by using the Handlebars comment syntax – “{{!— —}}”. Then copy and paste the Revere Review Read and Write snippets:
<div data-revere="read" data-itemid="{{product.sku}}" class="Revere__wrap Revere__default read"></div>
<div data-revere="write" data-itemid="{{product.sku}}" class="Revere__wrap Revere__default write"></div>

Save your work. The Read and Write Widgets are now on your site!
5. (*For Enterprise tier plans only) Next, you are going to add the Revere Questions Widget. For this example we are going to add it directly underneath of the Revere Read Widget. Revere Widgets can be placed pretty much anywhere on the page. Be sure to choose placement that works best for your Store.
<div data-revere="questions" data-itemid="{{product.sku}}" class="Revere__wrap Revere__default questions"></div>

Click “Save File”. The setup as it currently stands will require a little tweaking to make it look it’s best. For instance, in the Cornerstone Light Theme simply adding an <hr /> tag before the closing “{{/if}}” tag will give a nice visual break between the Reviews and Questions Widgets.
6. (*For Enterprise tier plans only) Now to add the Heartbeat Widget. Much like our previous Widgets, placement is going to depend on the Theme being used. Here, we are going to place the widget as high on the product detail page as possible to best entice users to let you know that they like your product. Back on the product-view.html page, place the Widget towards the top of the file’s markup:
<div data-revere="likes" data-itemid="{{product.sku}}" class="Revere__wrap Revere__default likes"></div>
In this example, I am placing the Heartbeat Widget directly below the Product Title

Remember to Save your work.
Next, you are going to place the Heartbeat Widget on your Brand Listing and Product Listing pages.
Open both card.html and list-view.html in the “templates/components/products” directory.
As with the Snippet Widget, we are going to use a slightly different bit of code to render the Heartbeat on the card.html and list-view.html templates. Copy and paste the following code:
<div data-revere="likes" data-itemid="{{sku}}" class="Revere__wrap Revere__default likes"></div>
Place the code somewhere within the root element in the template. For best results, place the Heartbeat as close to the top of the file as possible.
card.html:

list-item.html

Save your work. Time to move on to the final installation step!
7. Finally, you are going to install the Revere Cart Insights Widget. You will place a RevCart object on the page in a couple of places to ensure the best functionality. First place is the “Affiliate Conversion Tracking” section of the Admin tools, under “Advanced Settings”.

Inside of the “Conversion Tracking Code:” field, paste the following:
<script type="text/javascript">
(function e() {
var e = document.createElement("script");
e.type = "text/javascript", e.async = true, e.src = "//cdn.irevere.com/engine/v2.0.0/revere.min.js";
var t = document.getElementsByTagName("script")[0];
t.parentNode.insertBefore(e, t)
})();
</script>
<script>
RevCart = {
CompanyId: CCCCC,
CartAction: "order",
OrderId: "%%ORDER_ID%%",
Total: "%%ORDER_AMOUNT%%",
Currency: "USD"
}
</script>
Replace the “CompanyId” value CCCCC with your CompanyId.
(*The first <script> tag is the required method for loading the engine on checkout pages.)

Save your work.
Next, open the template file “templates/pages/cart.html”. Just before the closing </div> paste the following code:
<script>
RevCart = {
CartAction: 'cart',
CompanyId: CCCCC,
Currency: "USD",
{{#if cart.discount}}
Discount: {{cart.discount.value}},
{{/if}}
{{#if customer.email}}
Email: '{{customer.email}}',
{{/if}}
{{#if cart.sub_total}}
Subtotal: {{cart.sub_total.value}},
{{/if}}
{{#if cart.grand_total}}
Total: {{cart.grand_total.value}},
{{/if}}
{{#if cart.items}}
Items: [
{{#each cart.items}}
{
{{#if sku}}
ItemId: "{{sku}}",
{{/if}}
{{#if brand.name}}
Brand: "{{brand.name}}",
{{/if}}
{{#if name}}
Name: "{{name}}",
{{/if}}
{{#if price}}
Price: {{price.value}},
{{/if}}
{{#if quantity}}
Quantity: {{quantity}},
{{/if}}
{{#if image}}
ImageUrl: "{{getImage image}}",
{{/if}}
{{#if url}}
Url: "{{url}}"
{{/if}}
},
{{/each}}
]
{{/if}}
}
</script>
The resulting code placement should look something akin to this:

Remember to Save your work.
That’s it! You have installed Revere!
Check out our documentation for tips on how to customize the look and feel of Revere to match your website. If you have a question, you can reach out to us directly at [email protected].
